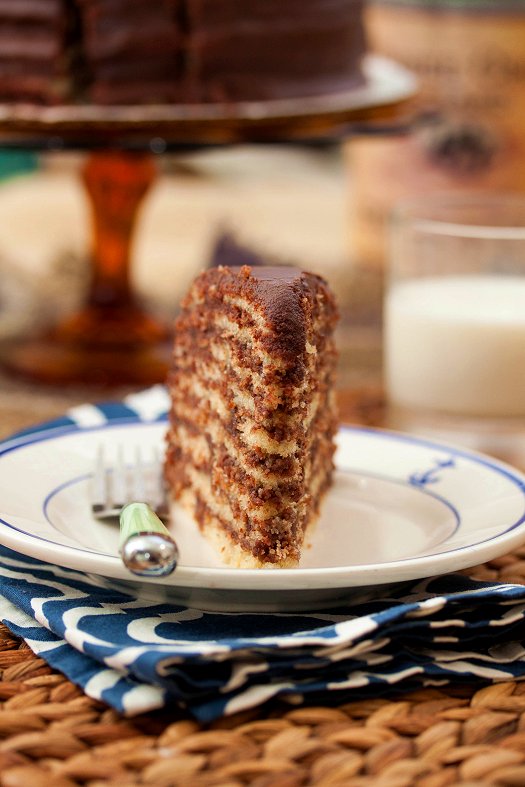
If there is one item that’s long been on my baking “bucket list”, it would be the Smith Island Cake. Baked by the wives and mothers of waterman on Smith Island to send off with their husbands and sons, who headed out to dredge oysters for days at a time in the fall and winter on the cold waters of the Chesapeake Bay. It’s legendary here on the Eastern Shore, and was named the official cake of the State of Maryland back in 2008.
It’s traditionally 10-layers, individually baked, and then layered and covered with a rich, fudge-like frosting. It’s spreadable when it’s warm, but then solidifies helping to hold the layers together as well as to seal in the moisture. Keeping the cake fresh and moist for the hard-working boys on the water who were out there digging up oysters for people’s Thanksgiving tables.
I finally tackled it for our 10 year anniversary a couple weeks ago, and I’ve gotta say – I don’t know why I was so scared. I used Francis Kitching’s recipe, the legendary hostess and cook of Smith Island. I only ended up with 9-layers, I should have used a little less than 2/3 cup, but I was still so impressed with myself I could barely contain my excitement. The cake baked up nicely, and the fudge frosting was easy to work with. So happy I gave this one a whirl and can finally say I have it under my belt. I look forward to experimenting with new flavor combinations in the future!
Add it to your bucket list , but do yourself a favor and don’t wait as long as I did to make it. It’s so impressive, a perfect cake to make for the holiday season!

Smith Island Cake
For the cake:
8 oz (2 sticks) unsalted butter, at room temperature (plus additional for greasing pans)
3 cups flour
1/4 tsp salt
1 1/2 tsp baking powder
2 cups sugar
5 large eggs
1 cup evaporated milk
2 tsp vanilla extract
1/2 cup water
For the frosting:
2 cups sugar
3/4 cup evaporated milk
5 oz unsweetened chocolate, chopped
4 oz (1 stick) unsalted butter
1 tsp vanilla extract
Position an oven rack in the middle of the oven; preheat to 350 degrees. Use butter to lightly grease ten 9-inch cake pans, or use 2 or 3 cake pans at a time and re-grease them as needed.
Combine the flour, salt and baking powder in a medium bowl, whisk to combine and set aside. Combine the evaporated milk, vanilla, and water in a large measuring cup, whisk to combine and set aside.
Combine the butter and sugar in the bowl of a stand mixer, beat on medium speed until light and creamy. Add the eggs one at a time; beat until smooth. With the mixer on low speed, add the dry ingredients alternately with the wet ingredients, beginning and ending with the dry ingredients and mixing just until incorporated. Scrape down the sides of the bowl and mix for 15 seconds longer.
Place a scant 2/3 cup of batter into each baking pan, spreading evenly. Bake 2 or 3 layers at a time on the middle oven rack for 8 to 9 minutes. (A layer is done when you hold it near your ear and do not hear it sizzle.)
While the cakes are baking, make the icing: Combine the sugar and evaporated milk in a medium saucepan over medium-low heat. Add the chocolate and butter; warm through, stirring, until both have melted. Increase the heat to medium and cook, stirring occasionally, for 10 to 15 minutes. Remove from the heat and add the vanilla extract, stirring to combine. The icing will be thin but will thicken as it cools.
As the cake layers are done, run a spatula around the edge of the pan and ease out the layers. Let them cool. Place the bottom layer on a cake plate; spread 2 or 3 spoonfuls of icing on each layer. (Don’t worry if a layer tears; no one will notice when the cake is finished.) Cover the top and sides of the cake with the remaining icing; push any icing that runs onto the plate back onto the cake.
Source: Mrs. Kitching’s Smith Island Cookbook